First flight conditions
1. Transport the installed and debugged aircraft to the open test site with propellers installed.
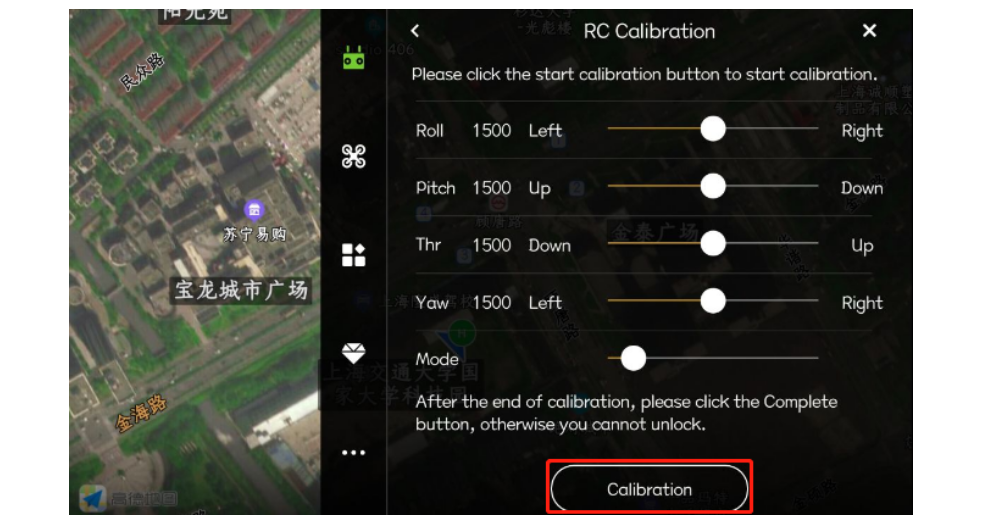
2. After the aircraft is powered on, use the Bluetooth of the mobile phone to connect to the APP, first perform the remote control calibration, and operate according to the prompts (during the calibration process, move each joystick of the remote control at the maximum angle, then place it in the middle position, and then click the calibration to complete)
3. Perform accelerometer calibration and magnetic compass calibration
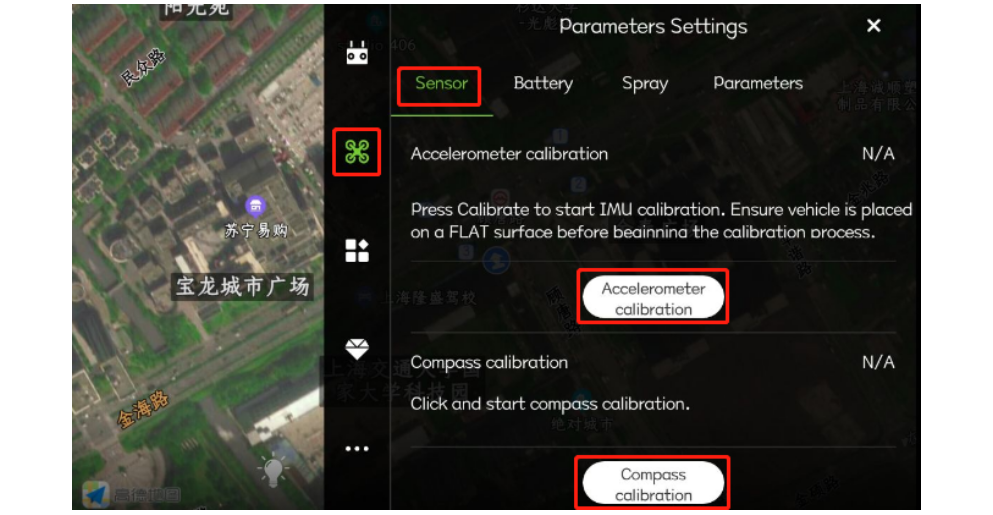
Accelerometer calibration: Click the “Accelerometer Calibration” button, calibration will be completed after 3-5 seconds. If the vehicle body is placed at a large tilt angle or shaken during calibration, recalibration is required.
Magnetic compass calibration: When the flight controller is not unlocked, quickly turn the flight mode switch of channel 5 back and forth (or click “Magnetic Compass Calibration” on the APP) to enter the calibration on both sides of the magnetic compass. The yellow light is always on, and the horizontal calibration is entered. At this time, place the aircraft horizontally and rotate the axis clockwise in the direction of gravity until the green LED light is always on, and then enter the vertical calibration. At this time, the head is facing down and the axis of gravity rotates until the LED flashes alternately in red, green and yellow, and the calibration is completed.

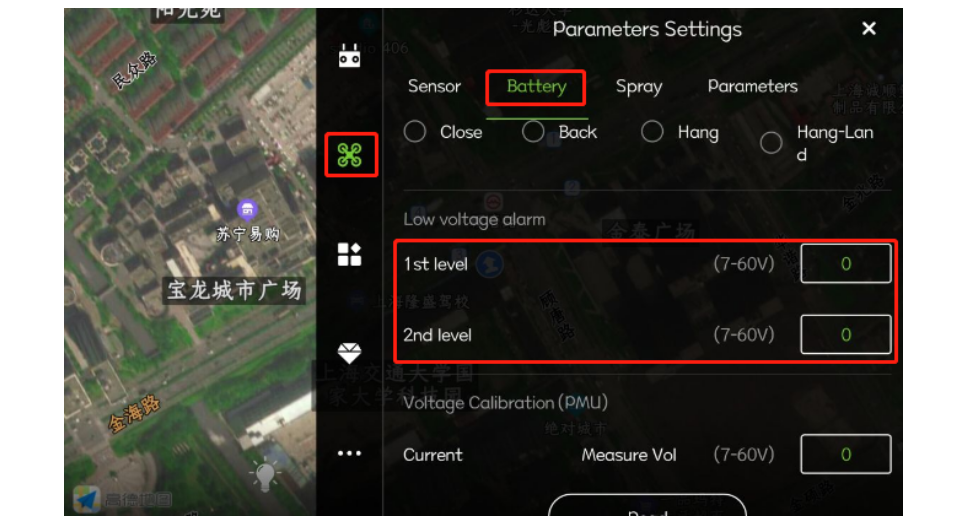
4. Set the alarm voltage
Take the 12S battery as an example. Level 1 alarm voltage: 44.3V, level 2 alarm voltage: 43.6V.
If the actual voltage of the battery does not match the voltage displayed on the APP, enter the actual voltage value at the measured voltage and click Save to perform voltage calibration.
5. Check the motor rotation sequence, direction and blade installation
Motor sequence test
When it is not unlocked, press the lever on the left side of the remote control ↙, and the lever on the right side to make a counterclockwise circle movement ↗↖↙↘ (American hand) to trigger the motor sequence test, and the motor will start idling in order from No. 1 to No. 8 .
Japanese hand motor test method of sticking: 1. Left stick ↙, right stick ↘ and hold; 2. Then left stick ↖, right stick ↙, left stick ↙, right stick ↘, the left stick keeps the left stick in the process of sticking. , Keep the right stick at the bottom, and repeat the four strokes in step 2 to trigger the motor sequence detection.
Note: Under normal circumstances, the motor sequence detection can be triggered by performing one stroke action. If the pole position is inaccurate, you need to repeat the four stroke actions in step 2 to trigger.
Motor direction test
After unlocking, the aircraft propeller runs evenly at low idle speed. Through the 4 channels of the remote control, it can be judged whether the front, rear, left and right steering are reversed. For example, when the forward lever is pushed down at idle speed, the propeller behind the aircraft rotates, and the propeller in front of the aircraft stops. The propeller on the side stalled, and the propeller on the right side of the aircraft turned.
6. After the above checks are completed, you can control the aircraft to take off slowly.
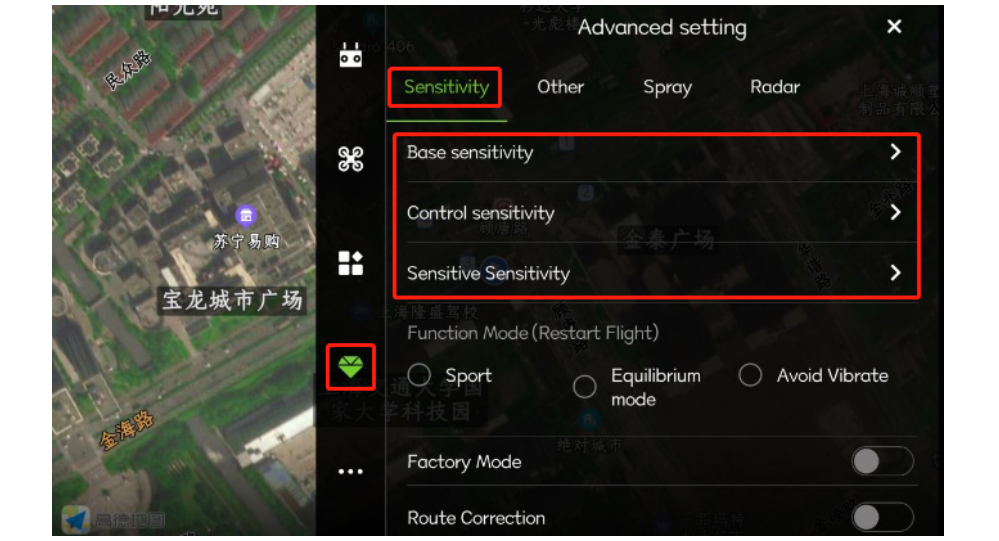
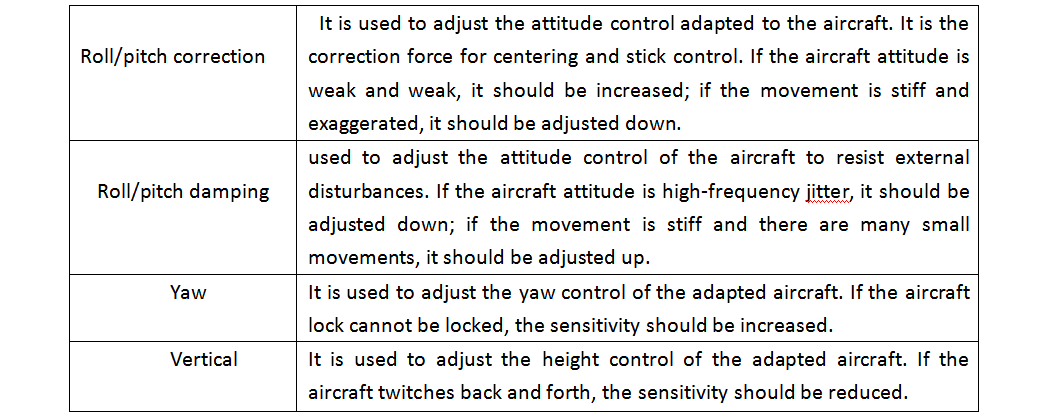
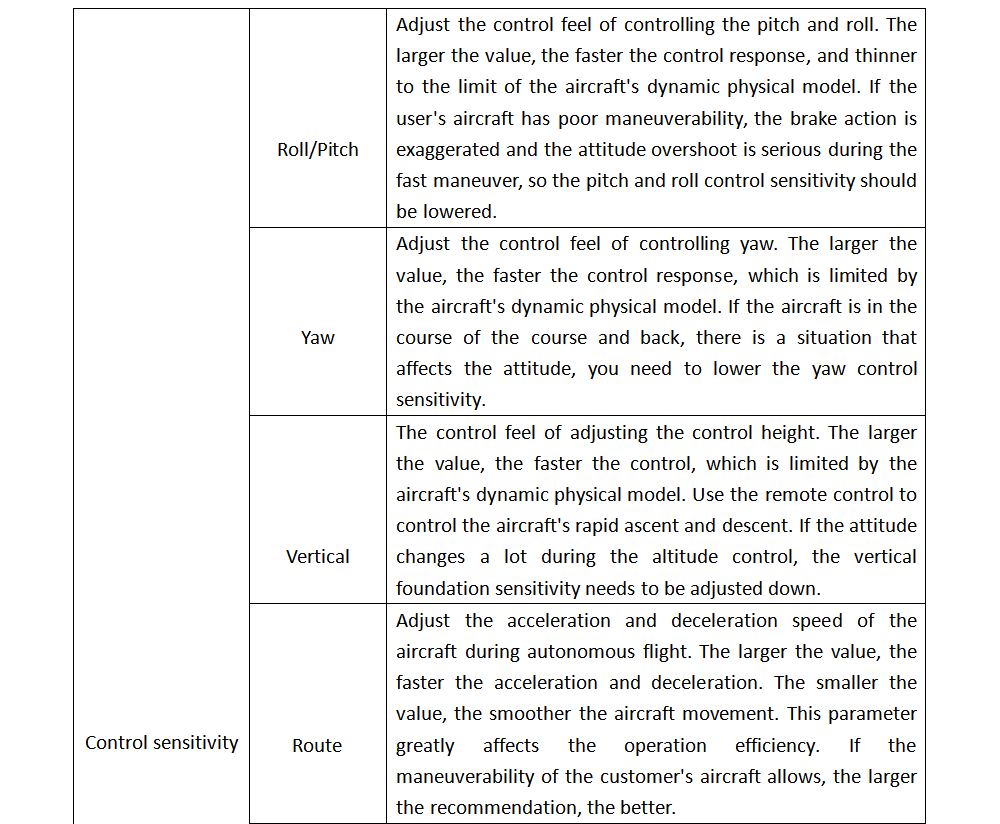
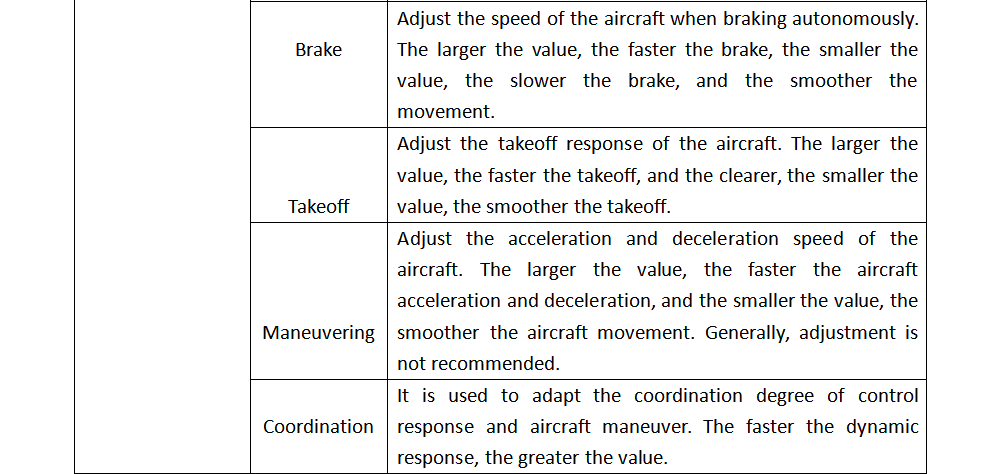
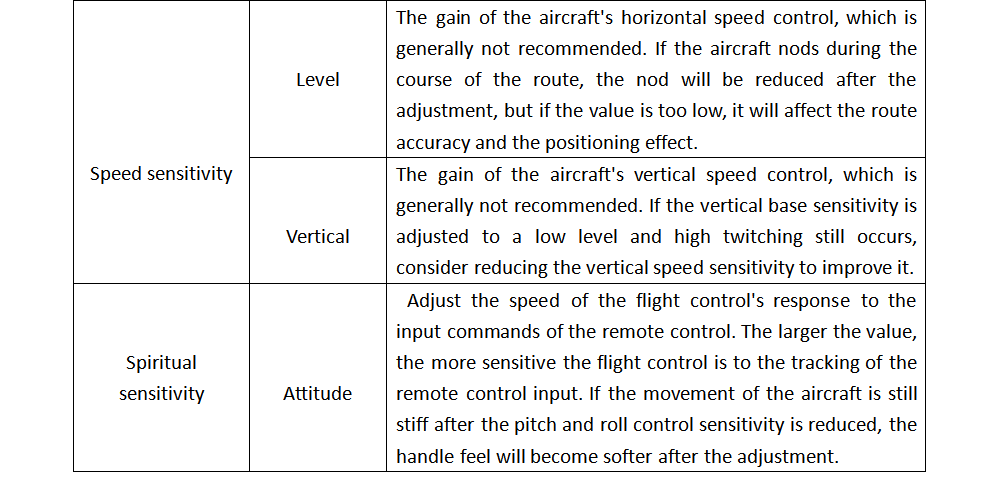
7. During the control process, if you feel that the hand feels inappropriate, you can debug according to the following methods (can be set in the mobile phone APP, as shown below)
Note: If there is no advanced settings interface in the settings interface, you need to turn on “USB debugging” in the developer options in the phone settings (different phones, the location of the developer options is different), and then restart the mobile APP, you can see the advanced settings interface.
Note: If there is no advanced settings interface in the settings interface, you need to turn on “USB debugging” in the developer options in the phone settings (different phones, the developer options are located differently), and then restart the mobile APP, you can see the advanced settings interface.
