Description of each product
1、K++ (https://support.jiyiuav.com/docs/skring )
Function: Simply put, K++ flight control is the brain of the UAV, controlling the hovering of the aircraft, flying the route, etc.
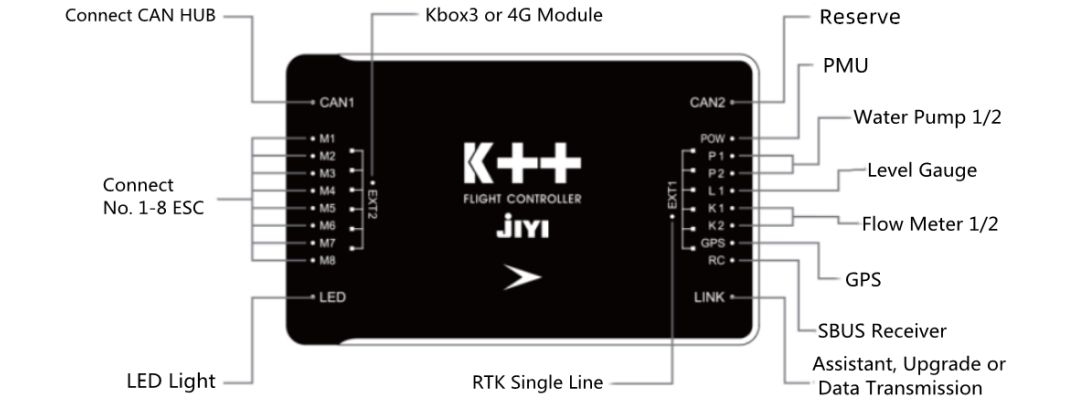
①. M1-M8: M1-M8 ESC signal cable
②. CAN1: CANHub
③. LED: LED
④. EXT2: KBOX-4
⑤. POW: PMU
⑥. P1, P2: water pump 1, water pump 2
⑦. L1: Level gauge
⑧. K1, K2: flow meter 1, flow meter 2
⑨. GPS: GPS, positioning function
⑩. RC: SBUS receiver
⑪. LINK: Connect to computer for parameter adjustment, upgrade or data transmission
⑫. EXT1: RTK signal line
⑬. CAN2: Preparation interface
2、CAN Hub (https://support.jiyiuav.com/docs/srui123/srui123-1c7t2625hudpg )
Function: Mainly expand equipment for CAN interface.
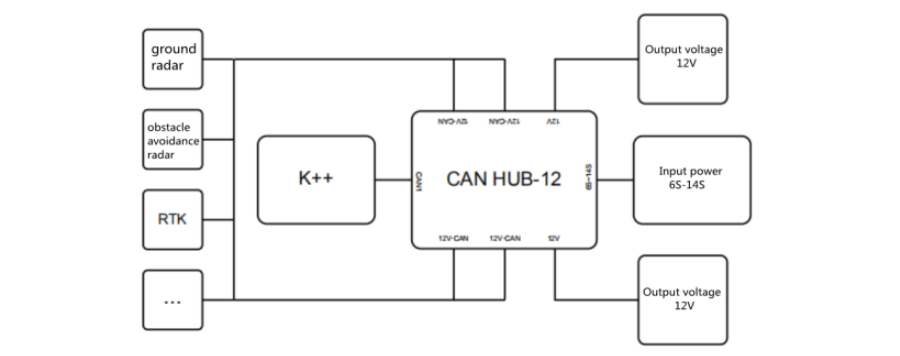
①. 6S-14S: power battery, supply power to the module
②. 12V: 12V power supply can be provided to other modules (except for high-power devices such as water pumps and flight controllers)
③. 12V-CAN: Ground defense radar, obstacle avoidance radar
④. CAN1: Flight control CAN1 port
3.Anti-Ground radar (https://support.jiyiuav.com/docs/sging/sging-1c8hcvnb8ipbl )

note:
When installing the radar, it should be noted that there is no obstruction in the range of 60 degrees below (as shown in the figure), and try to stay away from water mist.

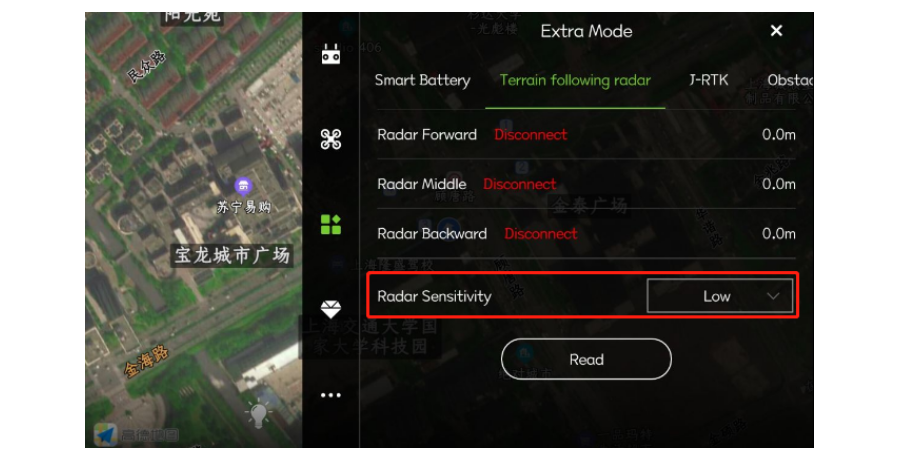
About the setting of radar sensitivity
Low sensitivity: suitable for high-stalk crops (such as sorghum, corn, etc.), gentle, limiting the rate of decline.It can prevent the rising and shaking caused by the lodging of the high pole and the uneven high pole.
Medium sensitivity: suitable for most scenes and non-high-stem crops (such as rice, wheat, soybeans, etc.). Moderate speed and moderate response.
High sensitivity: suitable for demonstration effects, and some non-working entertainment occasions, sensitive, fast rise, fast fall.
4.Obstacle avoidance radar (https://support.jiyiuav.com/docs/skning/skning-1c8jtpfthji51 )

note:
The radar is installed in front of the UAV and tilted upward by 10~15 degrees. It should be noted that there is no obstruction within 15 degrees in the front (as shown in the picture), and try to stay away from the water mist.

5.KBOX-4
Function:
1.Can provide network signal to RTK (for domestic use only)
2.Job records can be cached in the background of the computer
Port connection:
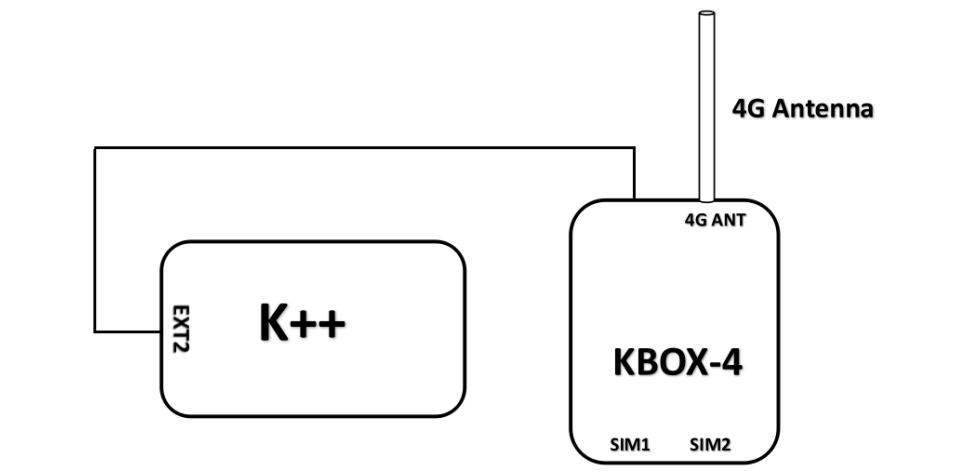
1. KBOX-4: K++ flight control EXT2 port
2. 4G ANT connects to the standard 4G antenna
3. SIM1, SIM2: local SIM mobile phone card (must have data traffic)
6.Remote control and receiver

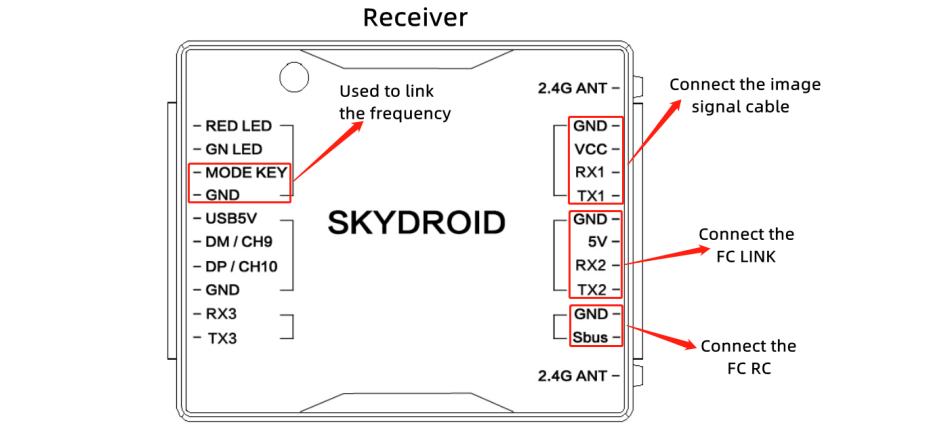
Note:
When the remote control is turned on, and the green light on the receiver is off, you need to link the frequency.
Linking operation: firstly short-circuit the MODE KEY and GND port to supply power to the receiver, the green light starts to flash, turn on the remote control, and the green light is always on, it means the link is successful.
UAV Correct antenna position Correct Position

Incorrect operation

7.Agriculture Assistant APP
Use the mobile browser to scan the code, download the mobile APP and install it

Note:
Invitation code: 8888
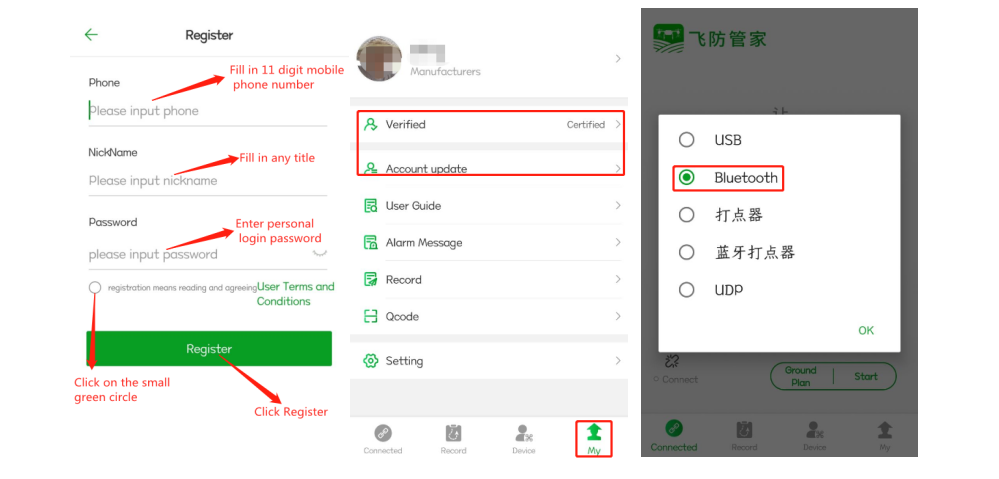
Register first, log in to the app and perform real-name authentication and account upgrade on the “my” interface (if you don’t understand, please refer to the Fly Defense Manager APP manual).
Connect the device in the “Connect” interface (using Bluetooth connection), as shown in the figure below:
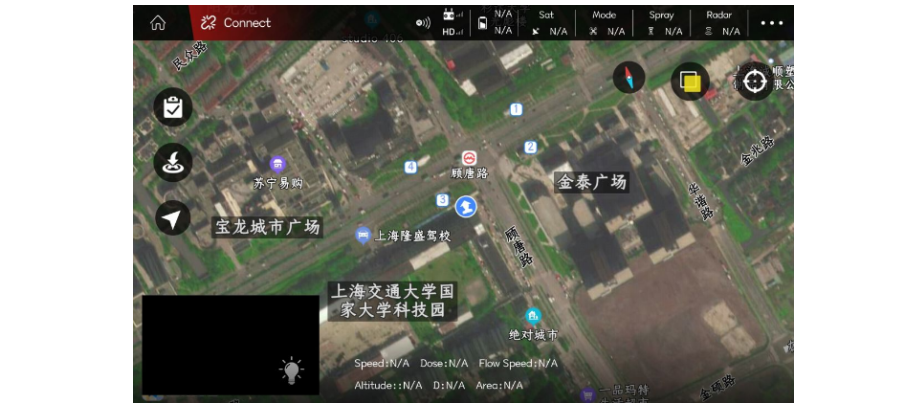
After Bluetooth connection, click “Execute Job” to enter the execution interface, you can check some status of the aircraft. As shown below:
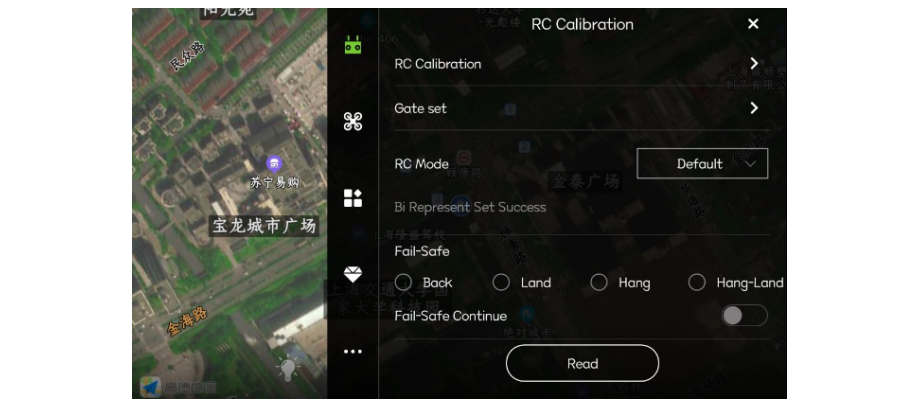
In the “Execute Job” interface, click the “···” icon in the upper right corner to enter the APP setting interface, as shown in the following figure:
8.Description of base station and RTK (the following picture is the connection diagram)(https://support.jiyiuav.com/docs/sk360/sk360-1cdsmt3qf7roi )(https://support.jiyiuav.com/docs/sk480/sk480-1cdqb924jbd72 )
PRI:Main helical antenna
SEC:Second helical antenna
RADIO:Radio antenna
2G:2G antenna
FC:RTK signal line and power supply line
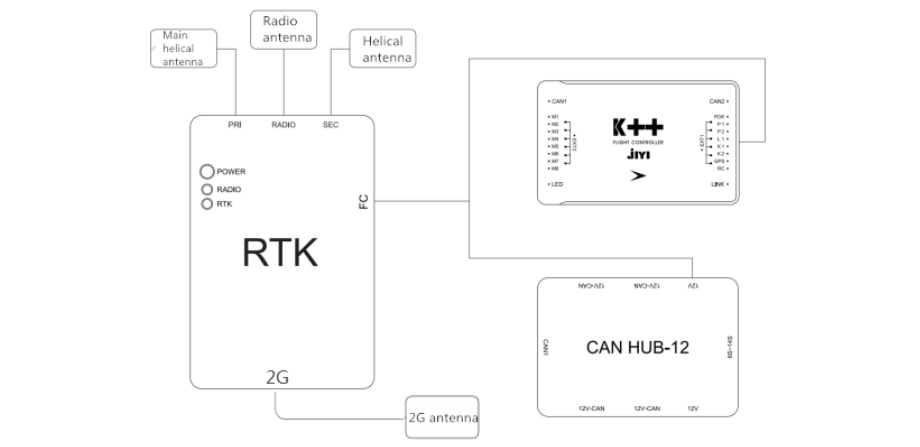
The shortest distance between the main antenna and the secondary antenna is 30cm.
The main antenna and the sub antenna must be vertical. If the installation is off, you can set it in the Assistant Software-Advanced-Expansion Module interface.

Set the installation angle in the computer assistant software, as shown in the figure:
